A big hello to all my friends as i am posting after so much time. In today's post, i will tell the bloggers how to create and add the 404 error page into your blog in order to reduce the chances of your visitors to move on to some other websites. 404 error pages are the pages of your blogs which are taken down by the blogger or webmaster due to some reasons but their url still exists in the search engine. So when someone click on that link, he or she lands to a page where nothing is there. You can make it well designed and can put in your website's home page or other links to again redirect the important traffic back to your blog.
We all know the importance of the traffic for a blogger. So lets start with its procedure.
How to Create and Add 404 Error page in your Blog:-
Step 1.) First of all, go to your blog's Dashboard and click on New Post.
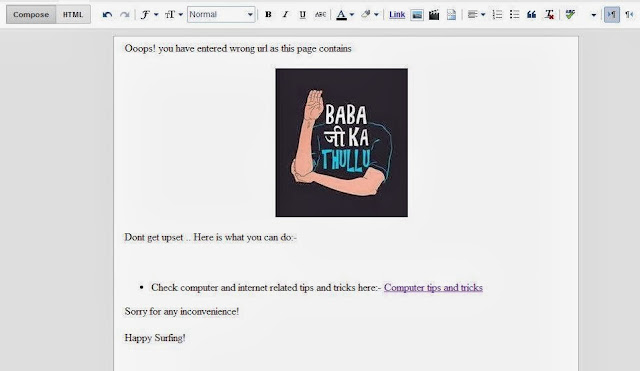
Step 2.) In the editor space, type a relevant message for your visitors or which you want your 404 error page look like. You can also insert an image for a better view and understanding. Below is the example of Best1articles 404 error page.
Step 3.) After giving final touch to your 404 error page in the editor window, click on the HTML option in the left upper part. It will provide you the HTML coding for your 404 error page. Copy the whole code.
Note:- Don't publish the above post.
Step 4.) Now again go to your blog's Dashboard. Go to:-
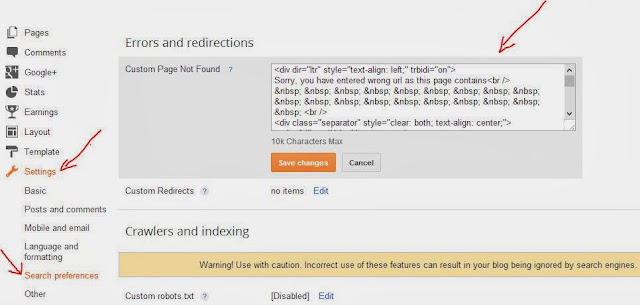
Settings > Search Preferences > Custom Page not Found (click on edit link)
Paste the HTML coding in the text area. Click on Save changes.
You are done with your 404 error page. For any problem, plz comment below. I would like to answer your questions.
Also see:-
Credits:- Yuvraj Salaria


